A successful launch in Moloco heavily depends on correct MMP integration and postback transmission. The events sent from your MMP to Moloco are what allow the algorithm to learn, find the right audience, and optimize campaigns for installs, purchases, or other target actions.
If postbacks are missing or incorrectly configured, the system won’t receive performance data. Without sufficient data, campaigns simply won’t start. In this guide, together with the RentAcc team, we’ll walk through how to properly add an app to Moloco, set up MMP integration, and verify that events are being passed correctly.
Preparing the App Before Adding to Moloco
Before adding your app, make sure it is technically ready. If the app has bugs, slow loading times, or UI issues, it will directly impact campaign performance. Any instability can lead to traffic loss and reduced revenue.
A properly functioning app, combined with support for multiple ad formats and diversified traffic sources in Moloco, allows you to fully leverage in-app potential.
How to Add an App in Moloco
Before launching a campaign, you need to register your app in Moloco.
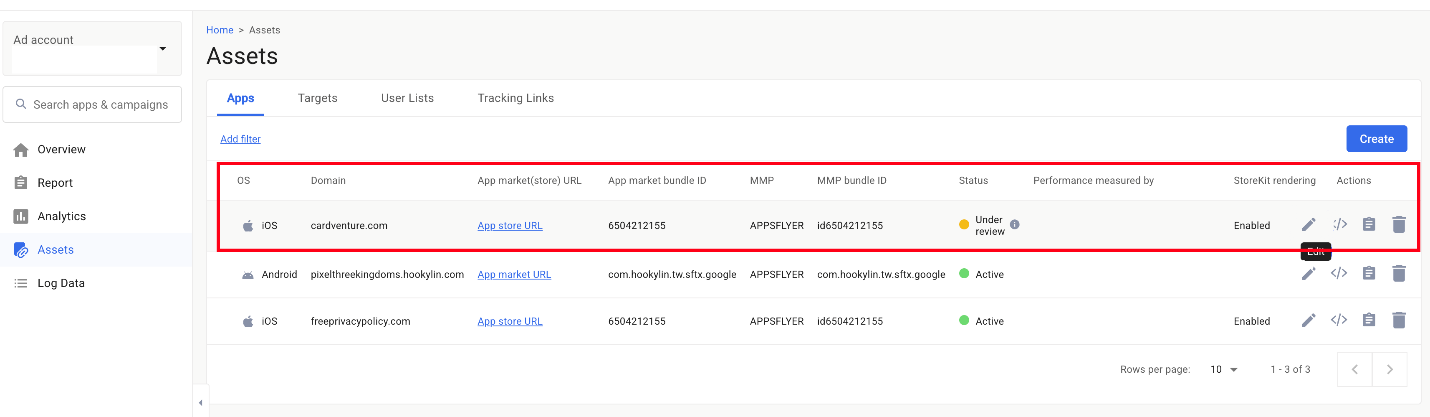
- Go to the “Assets” tab and click “Create” to add a new app.
- On the setup page select the app type, OS, and store. If your store is not listed, choose “Other” and specify it in “Alternative Stores”
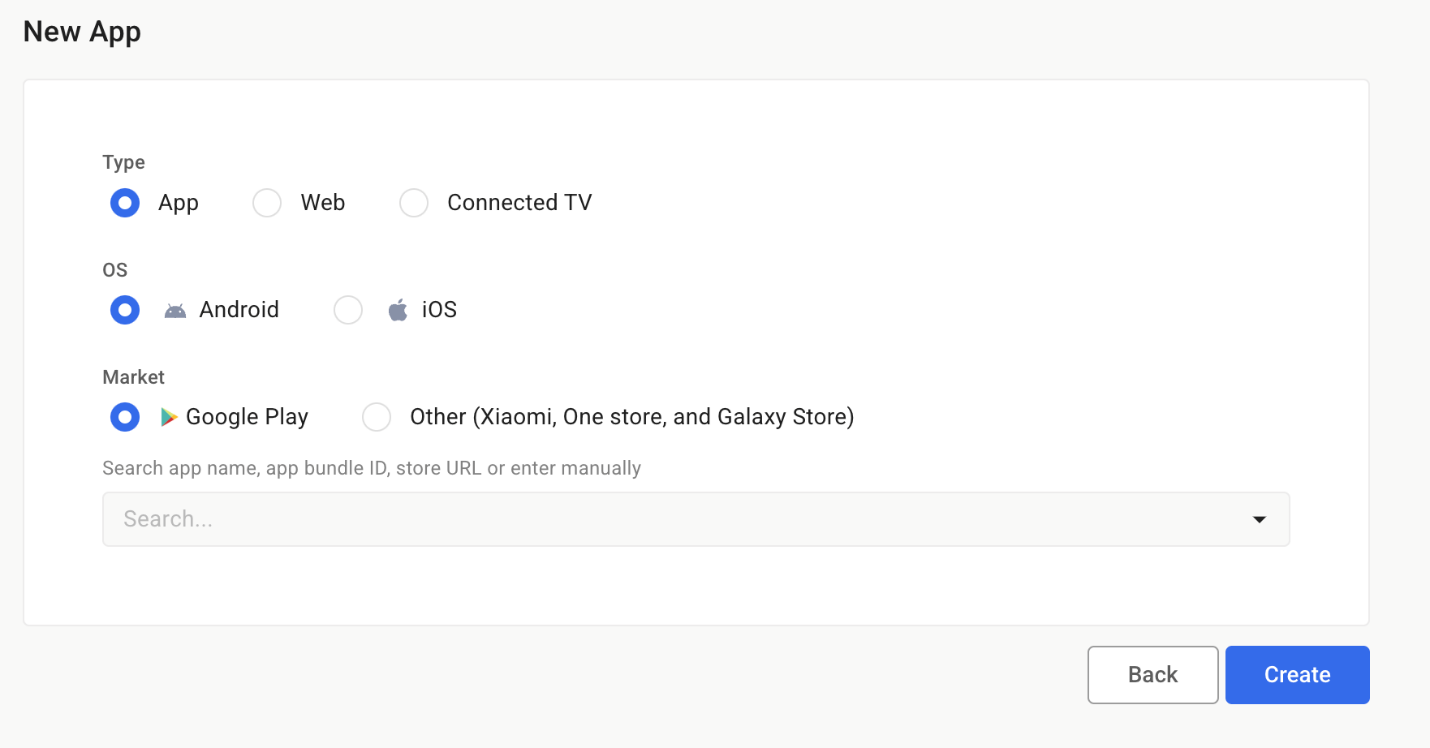
⚠️ Important: You must add iOS and Android versions separately, even if they have the same name.
- You should find the app by: name, bundle ID or store URL.
In most cases, Moloco automatically pulls app data. However, for One Store and Galaxy Store, all fields must be filled manually. Sometimes even App Store or Google Play data won’t load — here’s how to fill it manually.
The form looks like this:
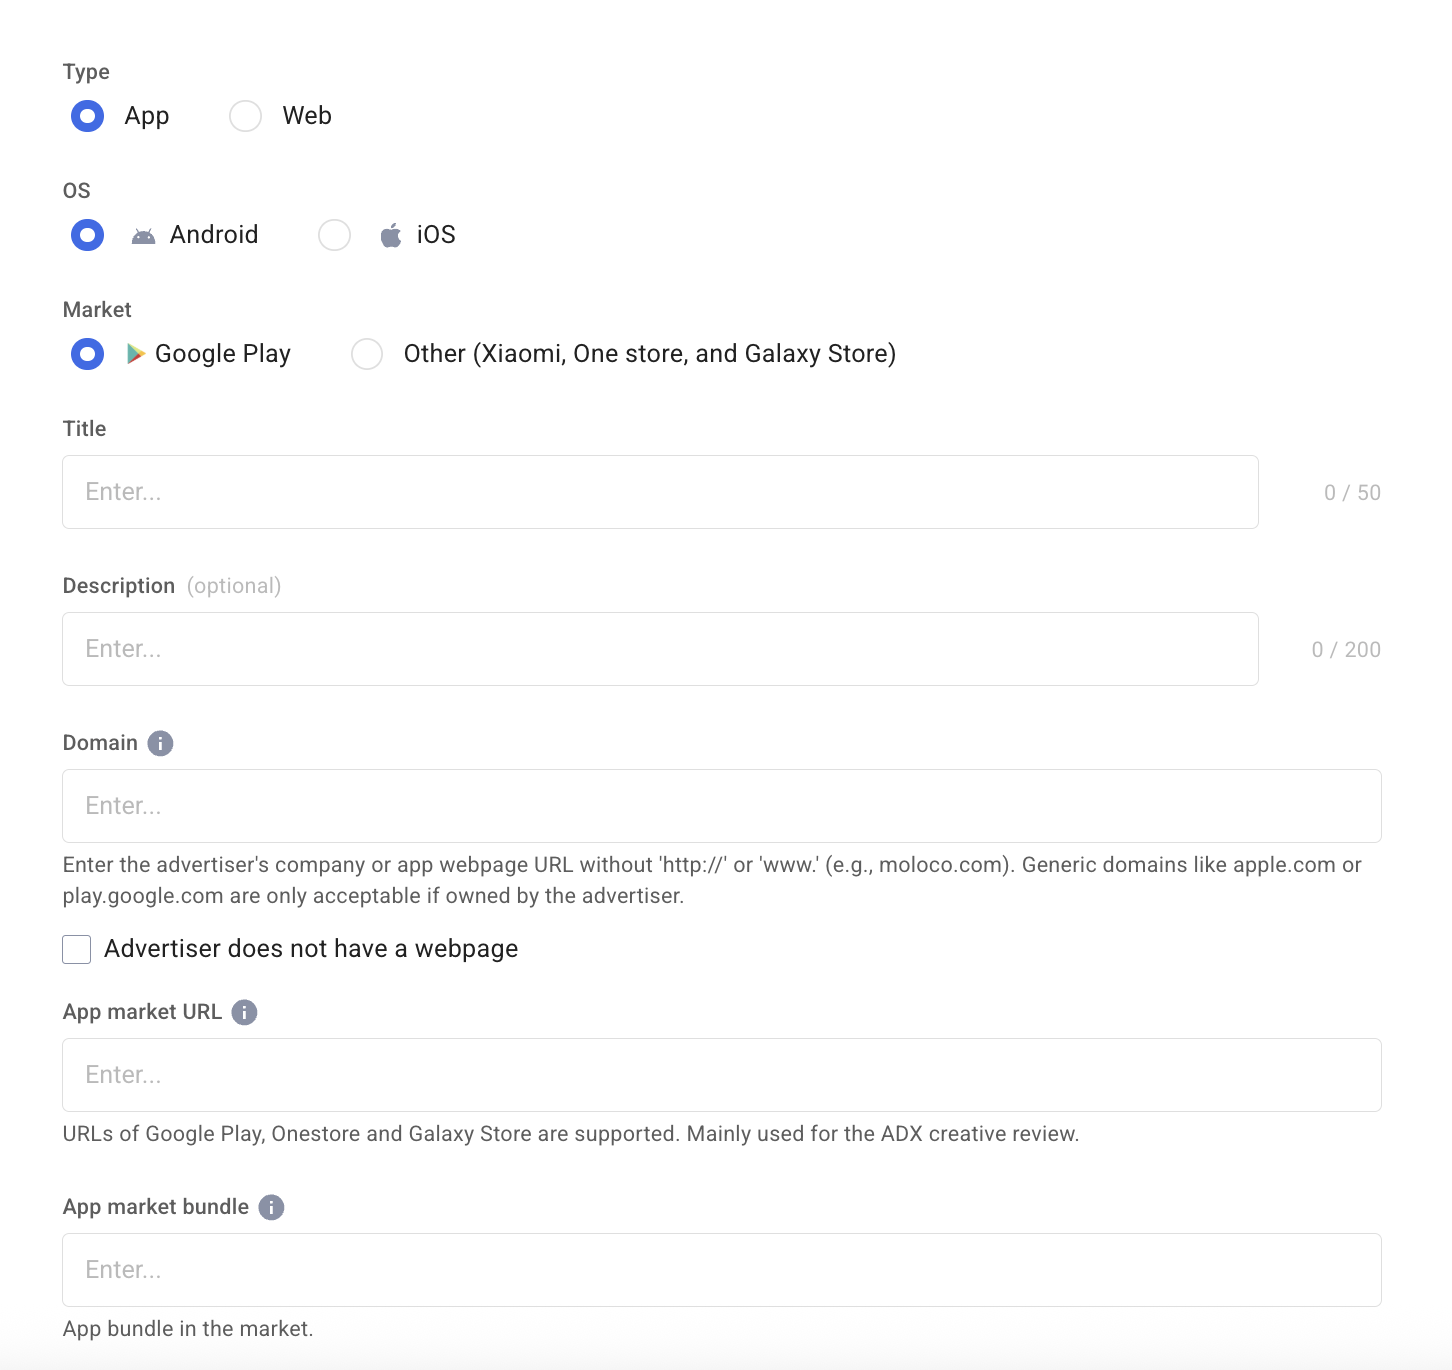
- Title — app name
- Description — optional
- Domain — skip if not available
- App market URL — link to the app store page
- App market bundle — app ID from the store URL
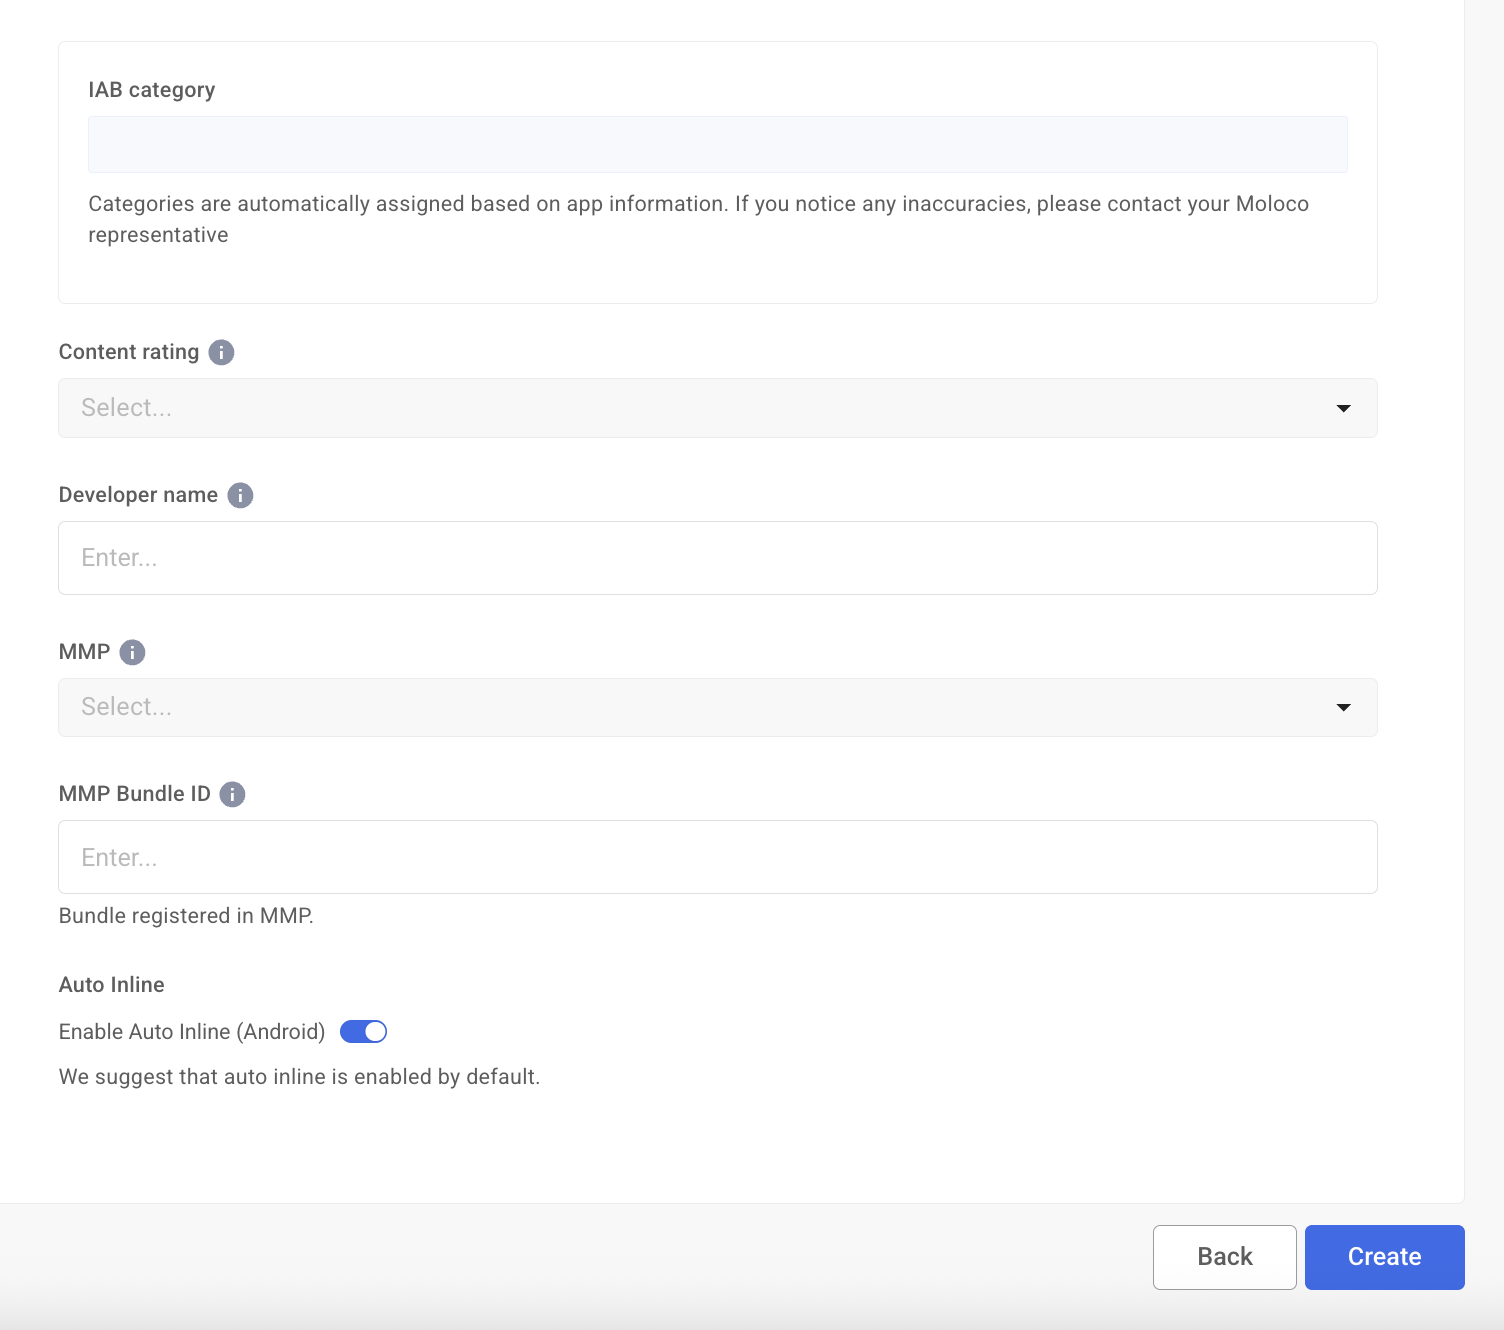
- Content rating — select from dropdown
- Developer name — from the store
- MMP — select your MMP provider
- MMP Bundle ID — for iOS apps, copy the App Market bundle and add the ID before the numbers. For Android, simply copy the App Market bundle.
And while the first part of the form is fairly straightforward, it’s important to understand where to find the data needed to correctly fill in the MMP information.
- Select the MMP partner you are working with from the dropdown list.
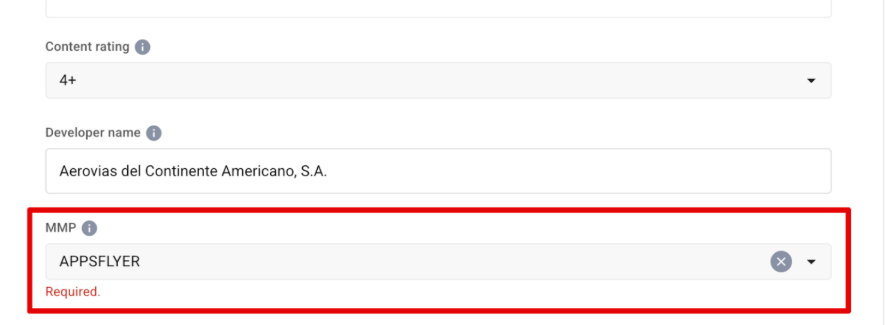
- In the “MMP Bundle ID” field, enter the ID from your MMP system.
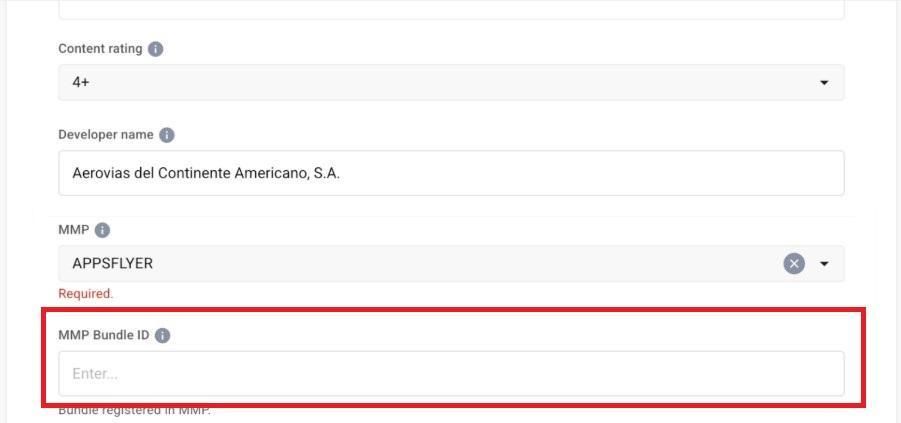
It’s important to verify that this value is correct, as Moloco uses it to receive postback data. For example, in AppsFlyer, the app_id in the tracking link must match this identifier.
For example:
https://play.google.com/store/apps/details?id=**com.android.chrome**
MMP Bundle ID — com.android.chrome
You can find step-by-step instructions on how to locate and correctly add the Bundle ID for each MMP in Moloco’s official documentation.
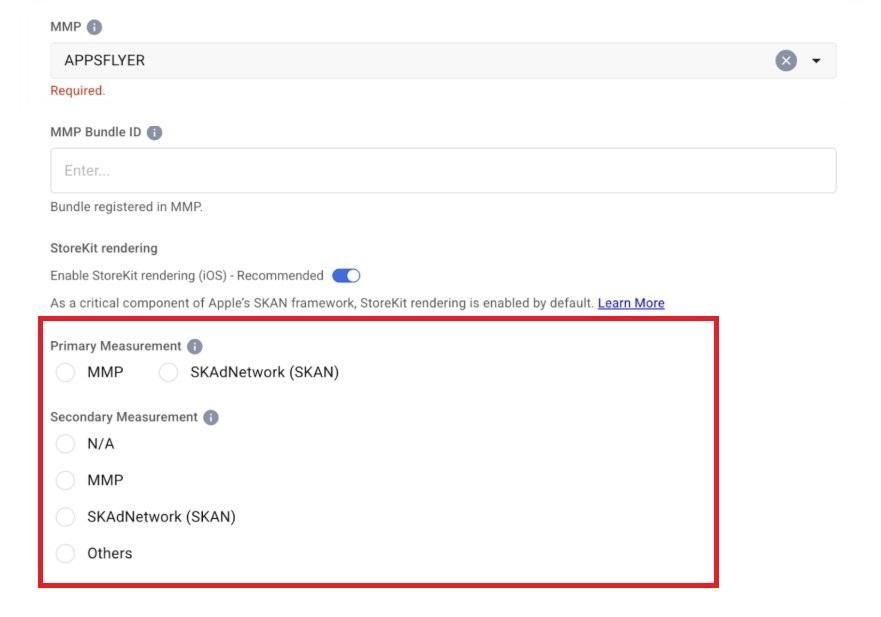
- In the “Primary Measurement” and “Secondary Measurement” fields, select the campaign performance measurement methods. If optimization and budget are tied to only one source, set the additional field to “N/A”. For example, if you work only with SKAN, set it as the primary measurement and leave the secondary empty.
- Click “Create” to complete the setup. Before doing so, double-check the operating system and selected MMP — they cannot be changed after registration.
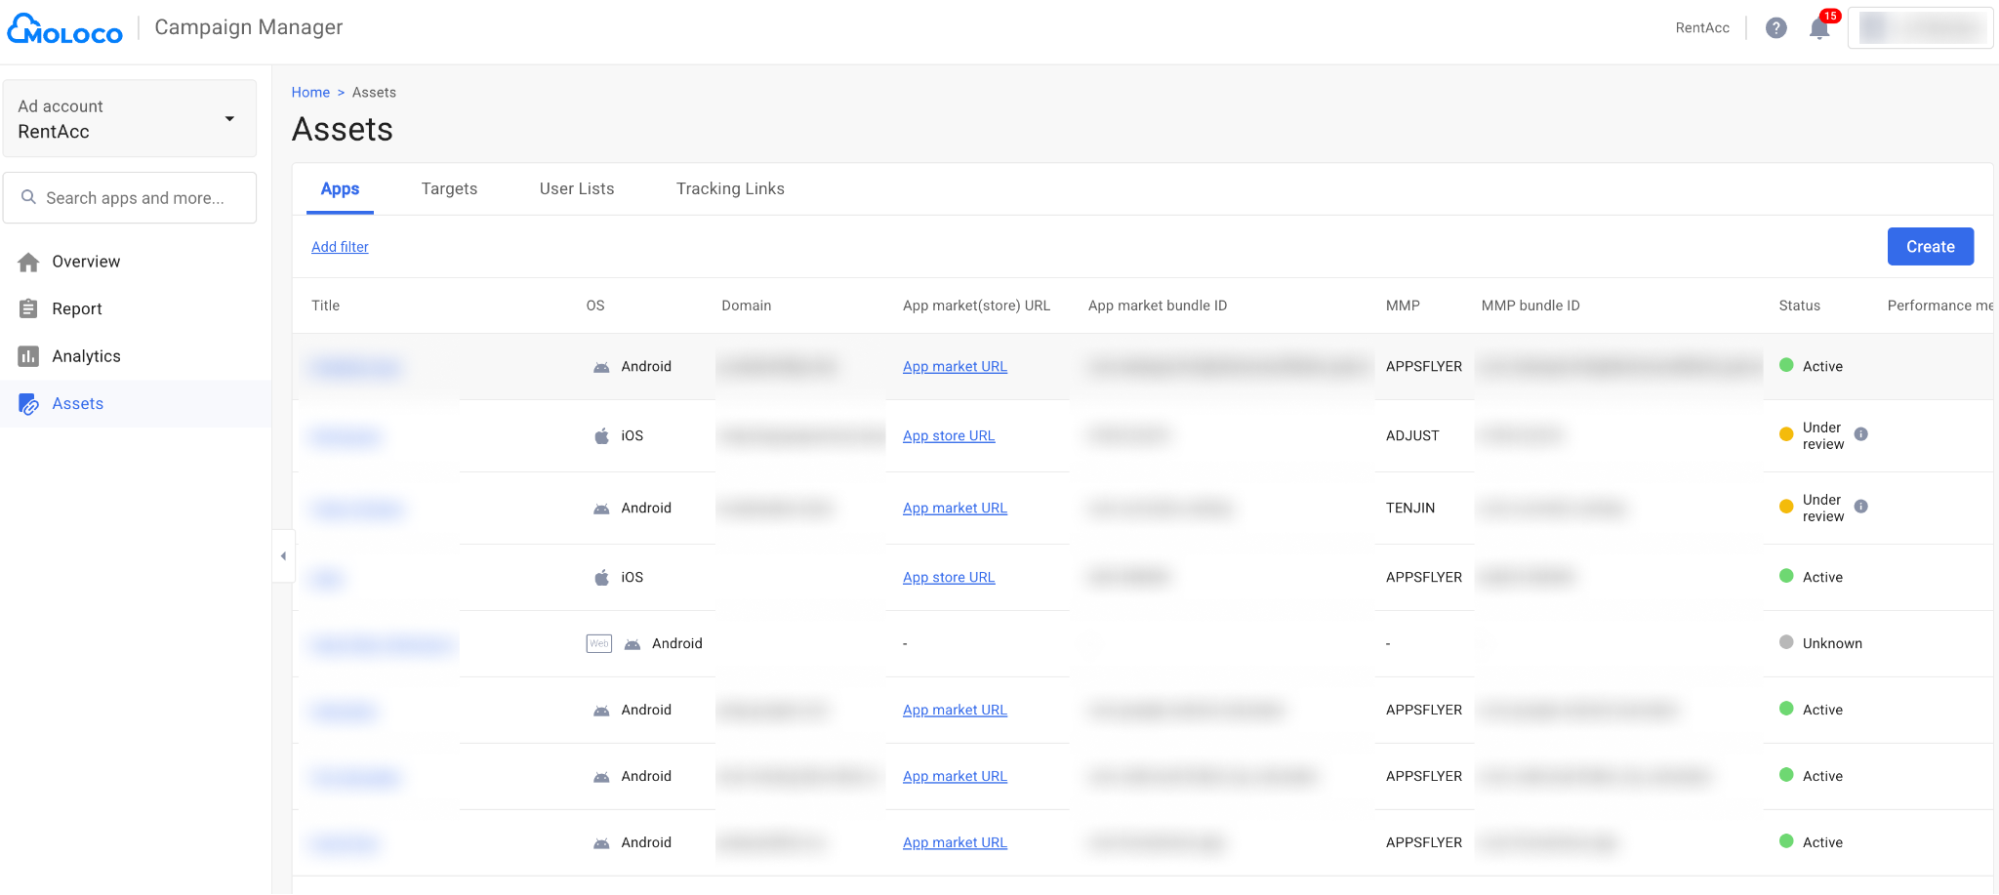
After that, the app will appear in the “Apps” tab and, once it passes review, will be available for campaign launch. The review process may take up to 24 hours, after which the app status will change to “Active.”
Setting Up MMP Integration
To launch campaigns in Moloco, you need to set up attribution through a mobile measurement partner (MMP). Without this integration, the system won’t receive performance data and won’t be able to optimize campaigns.
What is an MMP and why it’s needed for Moloco
An MMP (mobile measurement partner) is a third-party platform that collects campaign data and determines which traffic source each user action belongs to. This allows you to track performance across multiple placements.
An MMP tracks:
- ad impressions and clicks
- installs and first app opens
- in-app events via SDK integration
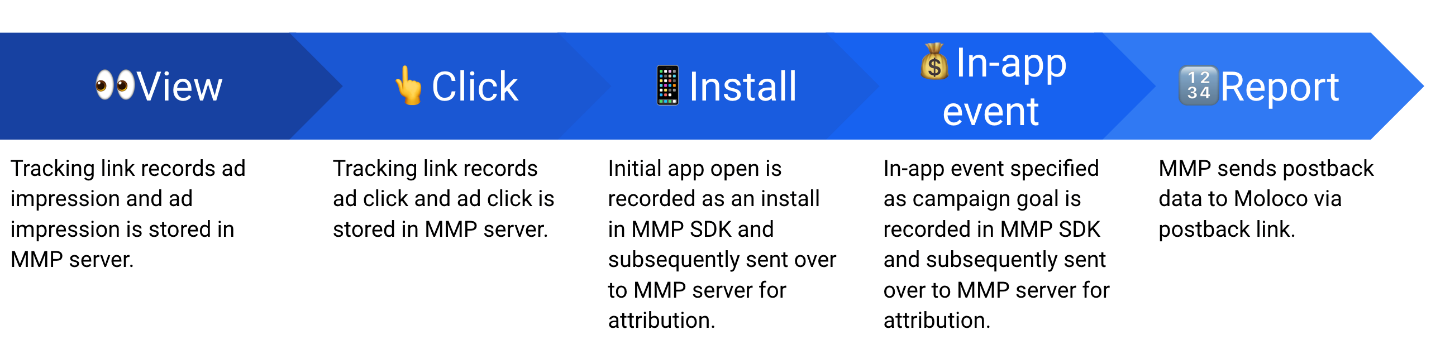
When a user sees an ad, an impression is recorded. After a click, the system logs the visit. Once the app is installed and opened, the MMP SDK sends install data to its server, where it is matched with previous user actions using an attribution model. All further events (registrations, purchases, etc.) are processed in the same way.
If full data sharing is enabled, the MMP sends both attributed and non-attributed events to Moloco. These datasets are critical for algorithm training and optimization, so it’s recommended to pass as many postbacks as possible.
MMPs Supported by Moloco
Moloco supports the following MMP platforms:
- AppsFlyer
- Adjust
- Singular
- Branch
- Kochava
- Airbridge
- Tenjin
Keep in mind that integration takes time, as it includes both setup and data validation on the Moloco side.
Setting Up Event transmission (Postbacks)
Let’s go through postback setup using AppsFlyer as an example. For other MMPs, refer to Moloco’s official documentation.
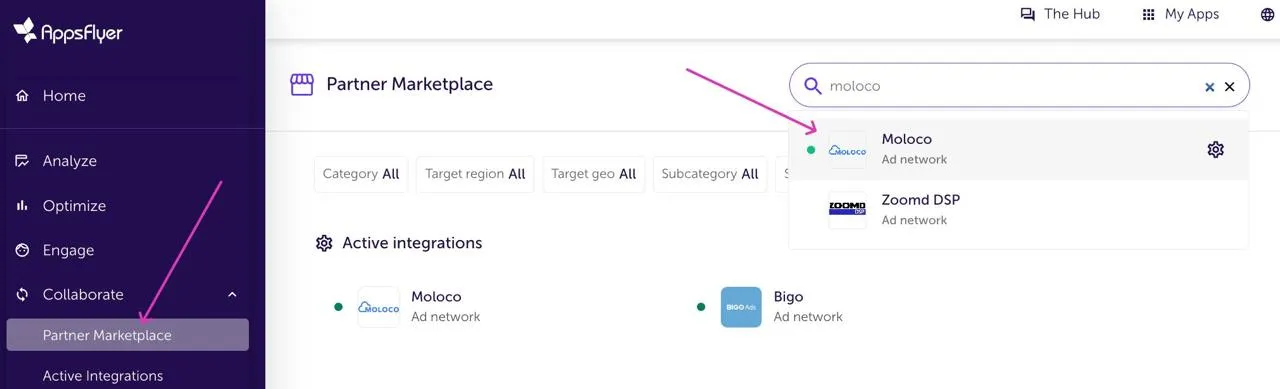
- Log in to AppsFlyer and go to “Collaborate” → “Partner Marketplace”. Select Moloco and the required app
2.1. For Android apps activate the partner and configure settings according to the pictures.
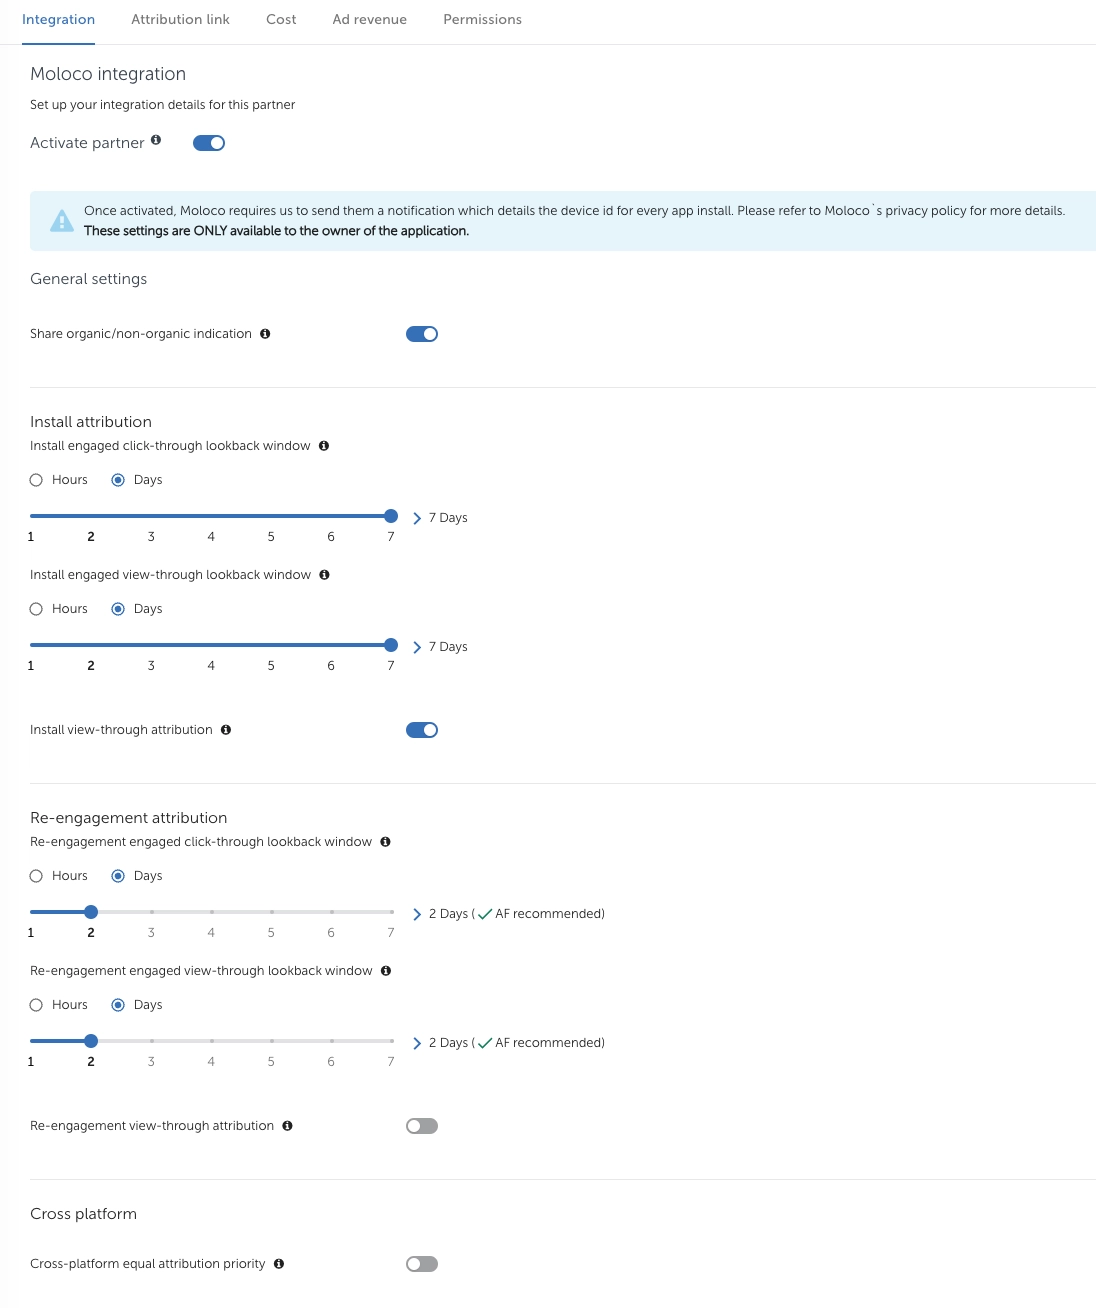
2.2. For iOS apps first, disable Advanced Privacy. You can do this by going to "Settings" → "App Settings" and disabling "Aggregated Advanced Privacy". Don't forget to save your changes.

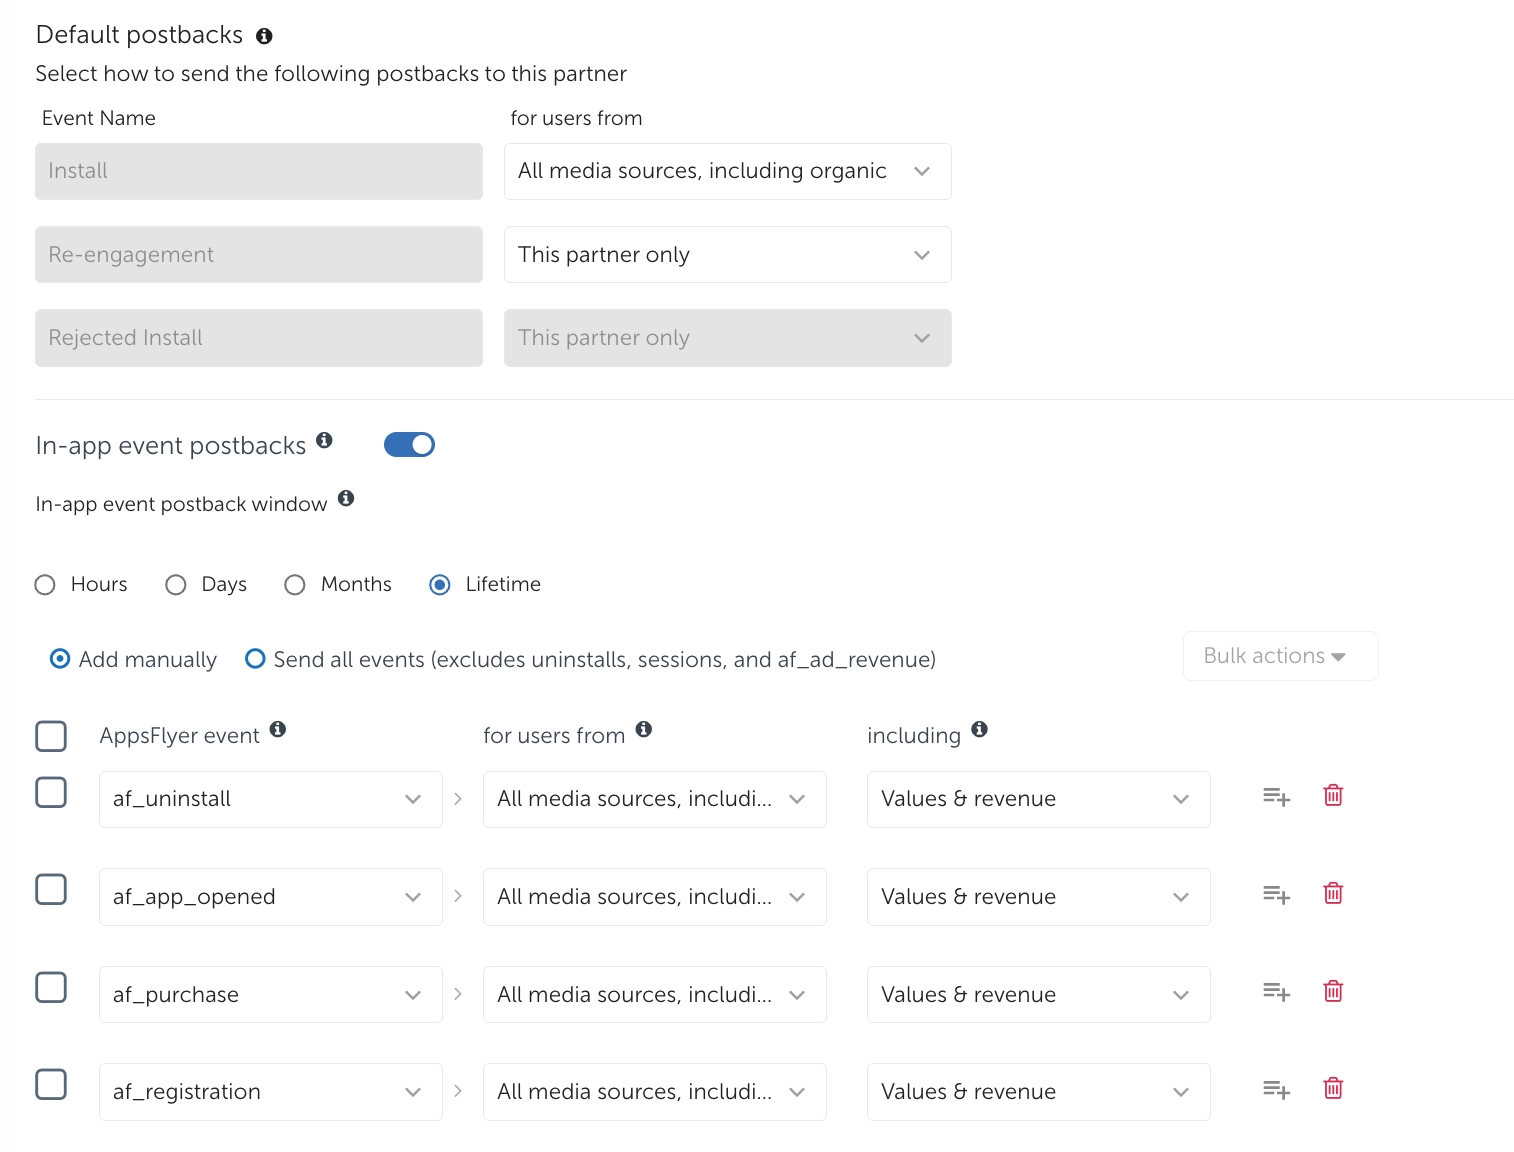
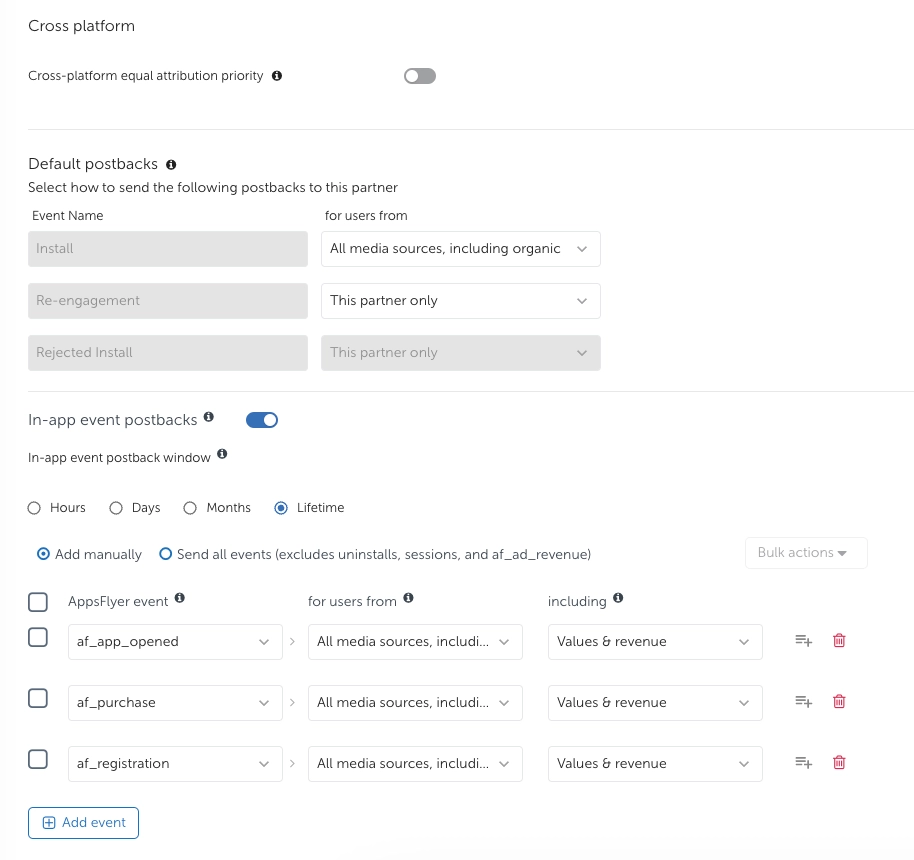
3. Next, we configure it as shown in the screenshots.

How to Check if Integration Works
You can verify the integration in the Postback Dashboard in Moloco. This section shows how many events (both attributed and unattributed) the system receives from your MMP.
We recommend checking the list of events and their volume to ensure that all data is transferred correctly and without loss. To do this:
- Go to “Assets” in the sidebar
- Open the “Apps” tab
- Select your app
- Scroll down to the Postback Dashboard
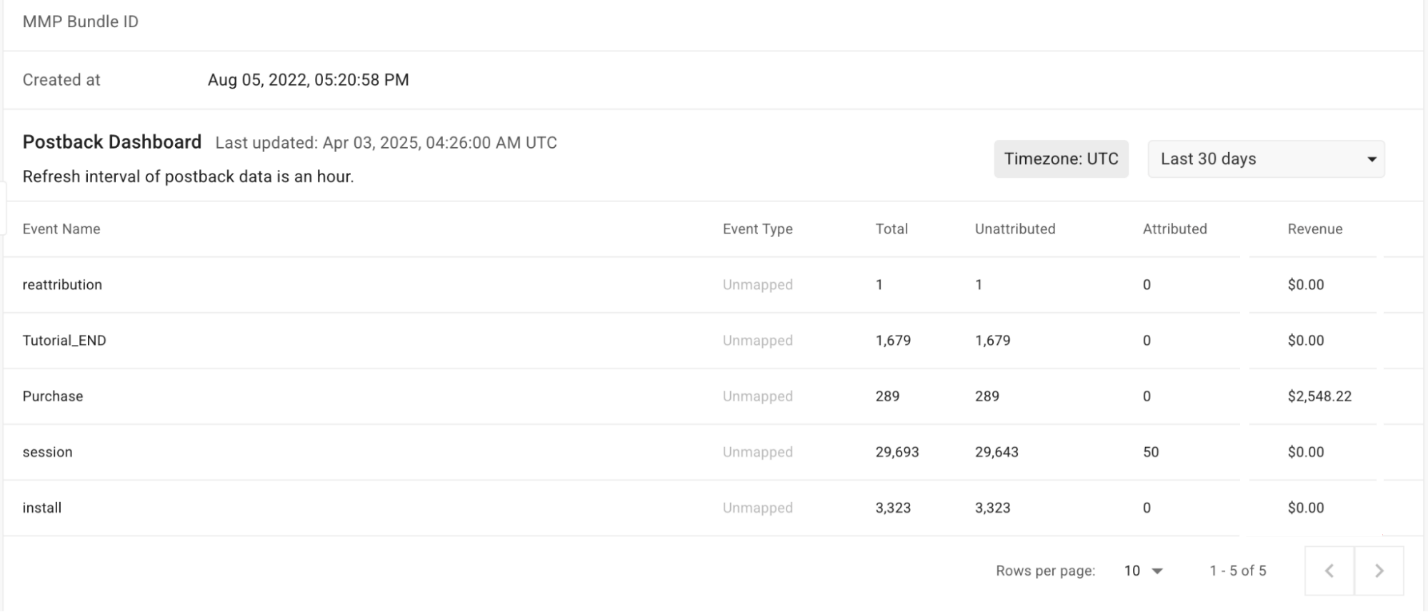
Here you can select the display period "Today" or "Last 30 days" and view statistics on events: the number of attributed and unattributed events, the total number of events, as well as the revenue for each of them.
Conclusion
Adding an app to Moloco and setting up MMP integration is a relatively straightforward process. Most issues are rare and can be resolved quickly. Given that Moloco can deliver strong results, it’s definitely worth testing as a traffic source.
If you don’t want to spend time dealing with documentation and debugging integrations, you can launch campaigns via RentAcc. You’ll get a reliable infrastructure, onboarding support, help with MMP setup, and practical recommendations during launch. On top of that, automation features like AutoRules, balance control, and campaign status notifications allow you to focus on performance instead of routine tasks.